I can’t remember how long have I been looking into eBay listings for a Bondwell Model-2 laptop. In the last 4 years this one was the third that appeared. I have seen one in Germany (with German keyboard) that I actually won the bid but the seller twice had problem with customs sending it and cancelled the deal. I suspect it has to do with the internal lead acid batteries, we get into that later. The second one was someone was selling the belongings from a deceased friend and did not know if the computer worked or not.
Being such a rarity I needed to make sure the computer booted and the screen was in working order so I had to pass that. But this one showed up working with the 512KB internal RAMCARD it was a must have.
Since this computer is not know and is not under the radar of (belonged to Steve Jobs in person listings) it was a very fair price for that. It even came inside an original Apple IIc case that fit very well for the size.

I’ve mentioned the batteries right, so in many countries lead acid batteries can only be imported if they are non-spillable. Sealed doesn’t mean that it will not spill if pierced or cracked and since the batteries were like 35 years old they were pretty dead. I would have to replace them anyway so I asked the seller to not ship them what saved a deal in international freight.
The machine was almost flawless only a small crack in the plastic for the lid.
Isn’t it a beauty ?
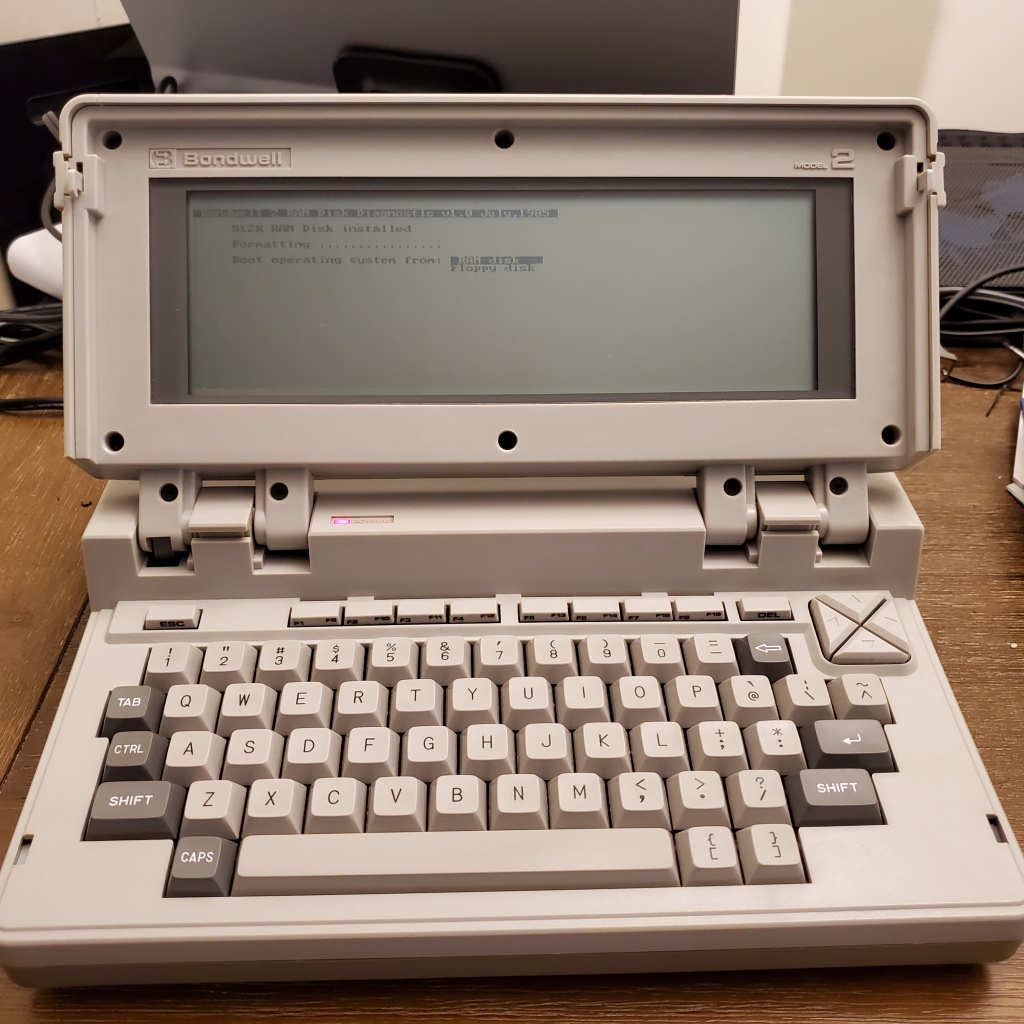
Why this machine you may ask, well this machine is unique on its own. It’s a laptop, made in 1985, do not mistake this one with the other Bondwell laptops like the look a like Model-8 or the B200, B300, etc. Those are IBM-PC clones but not this one.
This machine has a low voltage Z-80 inside and runs CP/M 2.2. My computer came with the optional 512Kb ramcard in the side slot. Other options are modem and external RAM.
The ramcard is pretty useful for compiling big projects in C, Cobol, etc.
Unfortunately I got zero manuals and zero disks. Fortunately Jim Battle has imaged many disks using Dave Dunfield ImageDisk tool and I got a special mini AT system for the job. Although it takes a dozen minutes to build each disk.
Replacing the Battery
It was pretty easy to find a replacement battery for it just a common SLA 12v 3.2A but something was off. The computer would not power up from it even being fully charged.
I found out the power jack has a mechanical switch for the battery and with the time the spring lots its spring-ness so I had to bend it few times. It is working now, but plugging back the cable makes it to lose power for a fraction. Maybe the caps aren’t that good or my switch is not 100%. But it works and I can carry it over the house, it is fun but this beast is heavy!
Initial impressions
Battery replaced and disks imaged I started playing around. Very satisfied with the keyboard, it has such a good feeling and nice touch. It is indeed a professional machine.
The LCD lid will also bend almost flat which is needed to actually see the text. The backlight is really missing here. There is a contrast dial on the bottom but it only makes everything darker even the background, not much help.
The floppy drive is a beltless TEAC and works pretty nice. No issues with it.
The terminal is a weird one and is compatible with ADM 3A with extensions. It supports inverse characters as well insert and delete line but they are not common codes:
| ASCII Sequence | Function |
| 1Ah or ESC-* | Clear screen and Home cursor |
| 1Eh | Home cursor |
| 0Ch | Cursor right |
| 08h | Cursor left / backspace |
| 0Bh | Cursor up |
| 0Ah | Cursor down / LF |
| ESC-T | Clear EOL |
| ESC-Y | Clear EOS |
| ESC-R | Delete line |
| ESC-E | Insert line |
| ESC-I | Inverse character |
| ESC-N | Normal character |
| ESC-G | Start graphic |
I couldn’t find much use for the graphic sequence (ESC-G) looks like it allows to put character from 0-31 on screen.
This machine is completely mute. There is no buzzer or beeper at all.
The Display
The display is a 640×200 pixels LCD and the Bondwell has 16KB of dedicated VRAM for it. So it is always in hi-res graphics mode.
Being in graphics mode all the time means you have to draw every character on screen, which could be slow. Although the BIOS seems to not have any graphics support. The characters bitmaps are in rom location 0x800.
The bondwell has the upper 32KB memory fixed and the lower bank can be switched over through ROM, VRAM, RAM1 to 6 (making 224KB when using the external RAM) or between the ROM and 16 banks of RAM for the RAMCARD.
The video RAM is in fact static RAM and is somehow contented by the LCD controller. Reading or writing too fast on it cause visual noise (snow) on screen. The screen also has a huge lag, scrolling up fast the text and all you see is blur.
But soon weird things started to happen. Turbo Pascal editor would not work properly as some other Z-80 specific programs.
Time to dig into the BIOS.
BIOS Disassembling
There is a service manual available for the Bondwell 2 and in this manual there is a BIOS listing at the end. You can find the source code at Jim’s page but something is off. The title at the end says:
HEADING: DB 1BH,'*',0AH,0AH,' CP/M VERSION 2.2 Graphic BIOS 1.0',0DH,0AH
But that is not what you get from any disk or ROM. Moreover assembling and adding this BIOS into a disk makes it to crash. So this source code is no good.
Looking at it seems to be an “improved” BIOS with graphics capabilities but at the cost of some features removed like PUNCH and READER.
What I did was disassembling and reconstructing the missing parts and remove the new features (there is no room for them as the space was tight). The resulting is a source code that will assembly to a exact binary as the ones found in the disks. You can find this file BIOS10.MAC inside my pack here.
Back to the problem
It was easy to spot the problem. The BIOS would trash the registers IX and IY and since CP/M was supposed to be 8080 only, the developers weren’t counting on it. Problem fixed, but I will take the opportunity to add few features my own.
I noticed the insert/delete line routines had a bug: the cursor would be copied over up and down causing a visual glitch. And I believe this was the reason the included Wordstar 3.30 wasn’t using them. Instead it used the slow path of redrawing every character on screen. Fixed that too and patched Wordstar to use them, included in the pack.
Also I checked the text drawing routine and I sped it up by unrolling and avoiding the use of IX register as it was doing. I was able to save many T-states compared to the original one. Text now is a bit faster. And the blit routine used in insert/delete line, could be replaced by LDIR/LDDR without any apparent noise, at least in my machine.
And as I mentioned before the machine was completely mute, so I added a BELL feedback, the entire screen will flash upon a character 07 (BELL). Now you can have a feedback when something is wrong.
The Other BIOS
There is another BIOS to tackle: the ramcard. This BIOS is almost identical except by the disk routines but this makes all variables to shift. A full disassembly was required and I was able to rename some functions and the code assembles to a full working BIOS even with modifications in code. Now the ramcard BIOS is fixed as well.
Then something happened…
Not with my Bondwell Model 2 but with my mini PC-AT. Remember I told I was using it to image and transfer the disks to the BW2. But all of sudden it stopped working, it would not boot from disk or hard disk and it wasn’t the CMOS or anything. Being such a small factor I can’t just replace the cards, I don’t have them, so I neeed to find another solution.
RS232
I must admit, hadn’t the PC-AT gone bad I wouldn’t try this path. So I scrambled to local computer store and bought a USB-to-RS232 cable and a null-modem just in case.
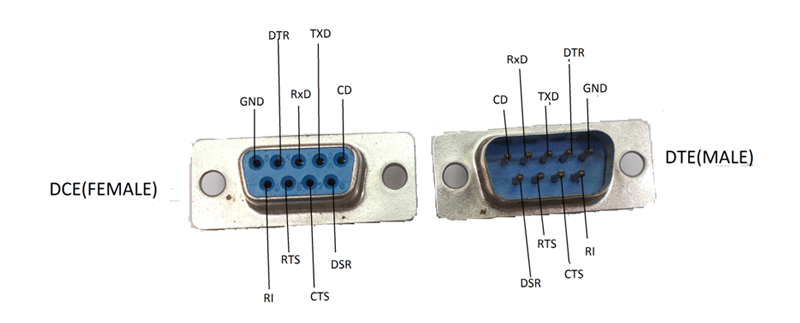
Since I had already imaged a CPM2.2 disk I had some tools there like MODEM7 or even PIP. But I couldn’t make it to work. It wasn’t talking to the PC. I tried the null modem cable no luck at all then I decide to check the pin on my BW2 and look at this:

Look at the pins, what were they thinking. Need to make an adapter good thing I just need 3 wires: GND, RxD and TxD:

Just cut two DB9 shells and glued together, one side female and the other male, wiring the pins to the correct DB9 RS232 pinout:
And voila a connection is established. It took sometime for me though there is a tool in CP/M 2.2 disk called SETUP that configures the RS232, otherwise you only get 300 bauds 7-bit only. With that tool I could get 19200 bauds 8-bits. This tools generates a small program to be called that will set the RS232 as you like.
There is a tool called MODEM7 on CP/M 2.2 which is pretty useful to test terminal and file transfers using XModem, but you need to configure the RS232 beforehand. On the PC you could use HyperTem, there is a trial version now that Microsoft stripped it from Windows 10. But if you have an old Windows XP image or disc you can get it from there. But personally I suggest Tera Term which is open source and does the job even better.
But I don’t like the MODEM7. Luckily there is a source code for a XMODEM.MAC out there which makes a handy command line tool. I needed to transfer the source code to the BW2 first and finish the configuration there as you need to add the RS232 routines by your own and test them.
Here, transferring a file in lightspeed (19200 bauds):

Great, this RS232 showed a even better way to transfer files. You can use PMARC.COM and PMEXT.COM to compress and decompress (useful when several files are transferred in one pack). All these tools you can find in my pack, under xmodem.imd image pack.
Oh, you may ask how did you make an IMD disk image if your PC-AT was busted ? Well I made a C++ command line tool to handle IMD images on Windows, it is self explanatory just run bw2imd.exe (as well in the same package)
Expanding the RAMCARD
When you open the RAMCARD you find a jumper next to the ROM chip, this allows the use of 27C256 (32KB) instead of 27C128 (16KB). You need to cut the current wire and soder a new one to the new position, I tried to remove the old wire and the board is too fragile for that, needed to repair with a wiring. Anyway with the extra 16KB we can add files to our RAMCARD.
In the boot area of the RAMCARD ROM there are two sections for moving blocks out of the ROM to the RAM. And with this I was able to add few programs: PIP.COM, FORMAT.COM, XMODEM.COM and SUBMIT.COM. With these programs you can transfer, format and copy files to your own floppies, no need for PC-ATs anymore.

And this ROM can be run with your original internal ROM. Just replace the ROM on the RAMCARD board. Also, I used a 29C256 instead of a 27C256. The 29x is a EEPROM and can be erased electronically, but you have to lift the pin 1 as it should be VCC (there is an internal pull-up apparently). Grounding it would put it into programming mode. I lift jusst enough to get it out of the socket in this way when I put it on EPROM programmer it still works on the ZIF socket.
Still talking about the internal ROM, my BW2 came with a different ROM. If you use the Jim Battle or the MESS ROM for the BW2 you will see it asking for a disk insert and pressing a button, but mine will boot silently no keys asked. I found this better the the other option. I don’t know if this is an official ROM but the chip was dated 1985 with an electrical tape covering the UV. I find this odd as companies would normally use stickers instead but anyway, you can get my ROM in the package as well.
What about Graphics ?
I came here for chewing bubble gum and doing some graphics and I ran out of bubble gum…
I turns out there is no graphics tool or program for it and it is pretty sad…well not anymore.
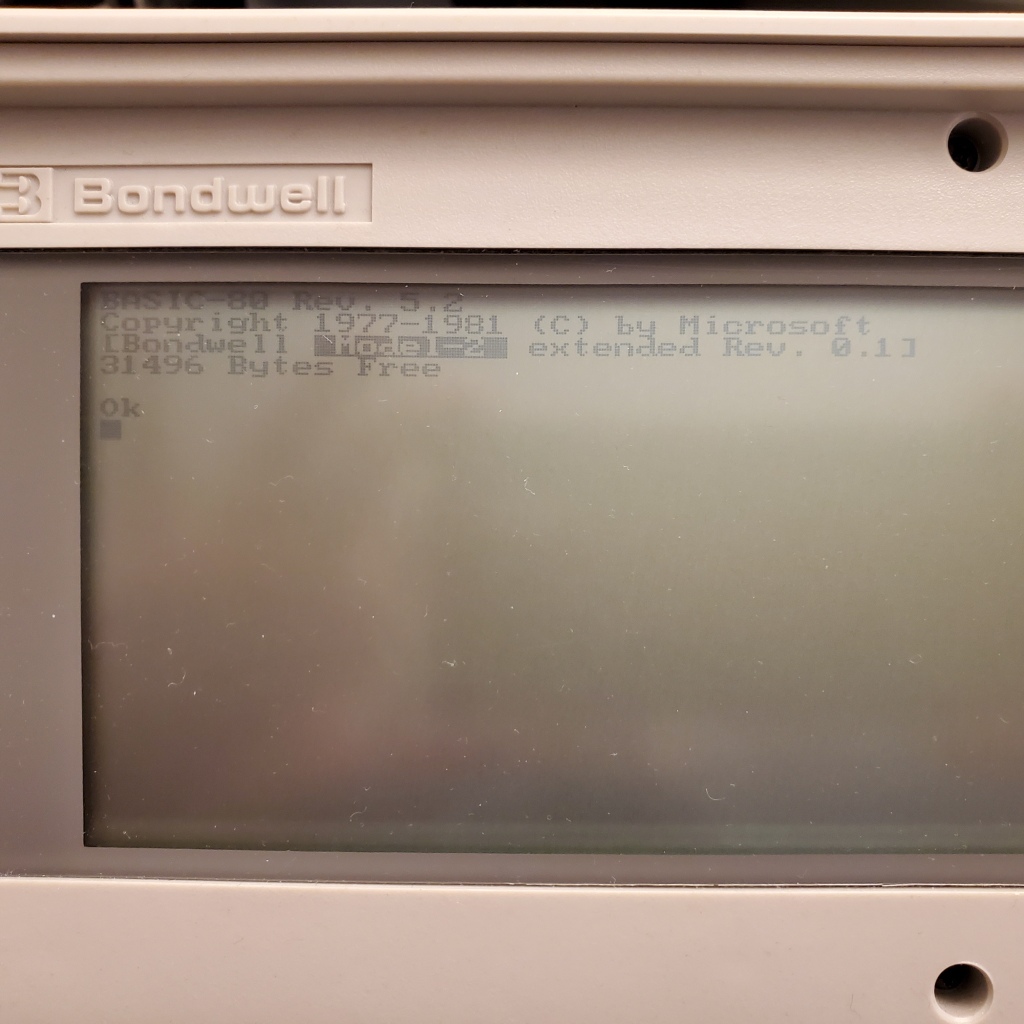
All I wanted was a BASIC to draw some stuff on screen and it is no surprise the Microsoft MBASIC for CP/M 80, but wait we have the source code as winworldpc.com has it for some time now.
First I needed to find out if this source code would actually assembly to something and it turns out the code which has portions written in 1975 by Bill Gates and Paul Allen themselves is pretty well documented. Now I have some ground to start.
If you are not familiar how BASIC works it converts the keyword like PRINT, GOTO, LET into tokens. Each token in this BASIC 5.2 has 8 bits what makes interpreting the code faster with a smaller footprint. The downside is that we don’t have many tokens left to expand, in fact there was only one token left.
; TOKENS
;**
;PADDING INITIALLY SET TO 2 BETWEEN LAST DISK STATEMENT AND TOKENS
;PADDING SET TO 1 – FEB 4, 1977
Q SET Q+1
;Q MUST BE SET SO TOKENS START AT RIGHT PLACE
As per 1977 there was only one token left.
One Token to Rule them All
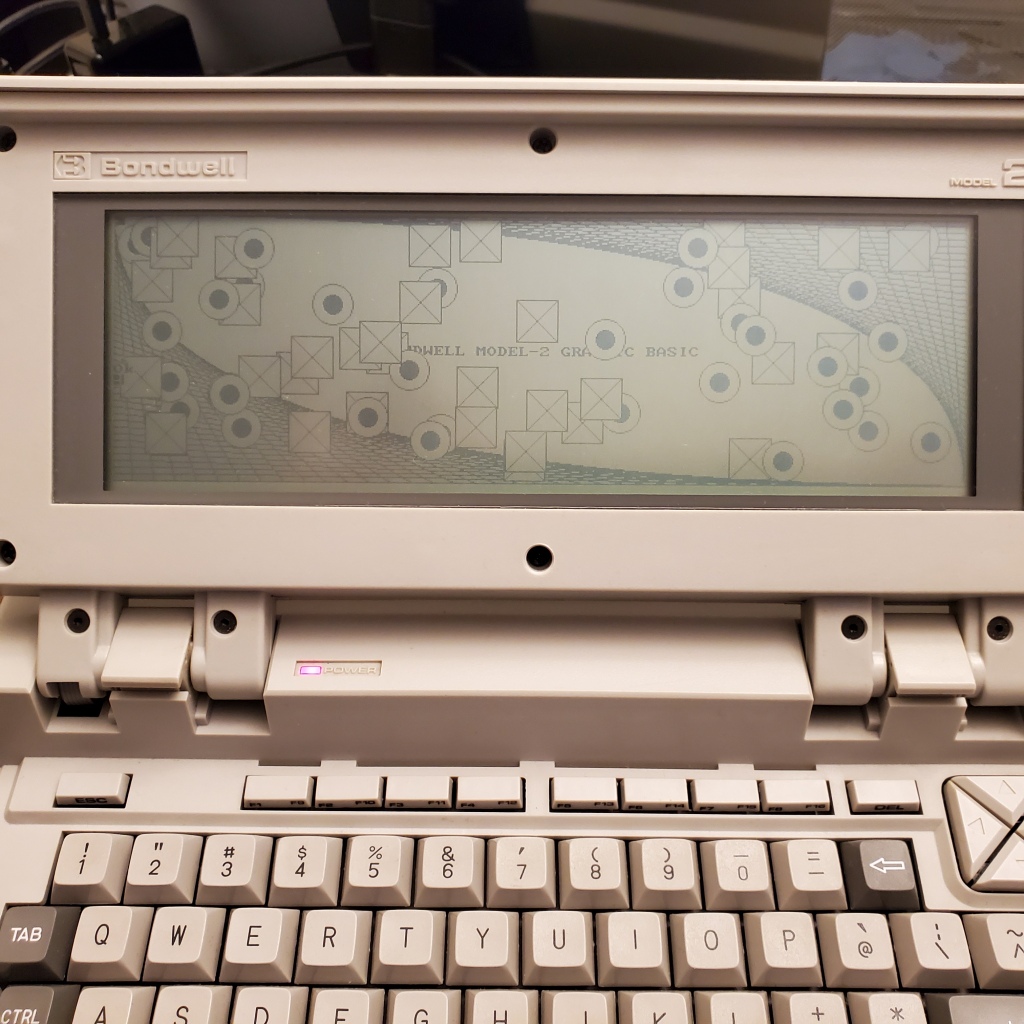
It turns out BASIC has some flexibility, whatever is not tokenized remains as plain text, so if we create just one token we can add parameters to it as text. With this in mind I created the following commands:
BW2 CLS
BW2 LOCATE x,y
BW2 PLOT(x,y)[,SET|RESET|XOR]
BW2 LINE(x1,y1)-(x2,y2)[,SET|RESET|XOR]
BW2 CIRCLE(x,y),r[,SET|RESET|XOR]
BW2 FILL(x,y)[,SET|RESET|XOR]
BW2 GET(x1,y1)-(x2,y2),array[,SET|RESET|XOR]
BW2 PUT(x,y),array[,SET|OR|XOR|AND]
These commands are pretty explanatory. The array for a GET/PUT is a regular array as DIM a(num of bytes) remembering 1 bit per pixel + 4 control bytes. There are some examples in basic.imd disk image, like SPRITE.BAS.
Using the new commands

Running SPRITE.BAS
You can get the new BW2BASIC on disk BW2BASIC.IMD
But if you are the kind of Turbo Pascal programmer I have made the same routines available for Turbo Pascal, check the TURBO.IMD file. Just remember to include the GRAPH.BIN file together your .COM file.
Emulating a Bondwell Model-2
If you want to try at home and don’t have this machine you can use MESS/MAME. There were few bugs there were I fixed and submitted the changes so make sure you got a latest build. I’ve added the support to write IMD disks as well. Just grab my new ROMS here and placed them inside a roms folder on mess/mame folder.

Start the BW2 as:
mess64 -window bw2 -exp ramcard -flop bw2basic.imd
It may complain about bad ROMS because I modified them.
Final Words
Well I wrap-up my work here. I may develop a game in turbo pascal using my routines but that for later.
For using the BW2IMD:
BW2IMD – Bondwell Model 2 Image Disk Manipulator
Syntax: bw2imd image_disk [cmd] [file]
where cmd is:
/DIR – list directory (default option)
/COPYTO – copy file from host to image disk
/COPYFROM – copy file from image disk to host
/ERASE – purge file from image disk
/FORMAT – erase entire image, including boot track
/DUMP – convert image disk to sector raw binary (DSK)
/BIOS – replace BIOS from image disk
Again all the files are in one pack here.
